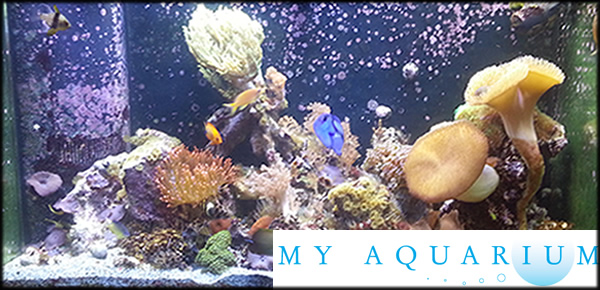
How To Set Up Your Planted Aquarium
So you have decided to set up an aquarium more complicated than just a tank with random fish and a bubbling volcano and floating scuba diver, plants add a natural and beautiful look to any aquarium and make for a more healthy, stable, and complete system. Setting up a planted aquarium can be a little more expensive and challenging but with the right instruction it can be very rewarding.
This article will help ensure you have success Setting Up Your First Planted Tank, follow the What You Need For A Planted Tank to ensure you get all the equipment you need before you start setting up.
Before you start setting up your new aquarium you should Visualize Your Tank Layout. Get an idea in your head of what kind of tank you want; when it comes to landscaping, backgrounds, decorations, and plant or animal choices your options are endless. It is best to have a good idea what you want before hand to avoid having to make costly or difficult adjustments later. Do a Google image or Youtube search on planted tanks, you can also check out pictures on the Planted Tank and Rate my Fish Tank web sites to get some great ideas.
Where To Put The Tank Itself:
When choosing your tank the rule is generally the bigger the better, bigger tanks are less susceptible to chemical problems and remain more stable, go for the biggest aquarium you can afford and have room for. Keep in mind that the cost of the tank itself isn't the only cost that will go up as you get a bigger tank, equipment, livestock, and cost of maintenance will go up as well.
Before you purchase your tank you will need to find a suitable place in your home to put it where it will properly fit and thrive, remember it is very difficult to move later so try to be as sure about its placement as possible. Don't place your tank directly under a window or glass door, direct sunlight can cause severe problems with plant and algae growth.
Make sure the tank is on a stable and level surface, if there is any unevenness the tank is more likely to develop leaks. If the tank is not exactly level try placing some corrugated cardboard underneath the aquarium to help level it out.
It is a good idea to fill your tank with water outside first to ensure you don't have any leaks or problems with the tanks structure, this goes ten fold if you purchased your tank used, most new tanks will not leak but it does happen and it is better if you don't discover this in your living room.
Preparing Gravel And Substrate:
Substrate is a term that refers to any type of medium your plants root in and draw nutrients from; common substrates include gravel, sand, laterite, flourite, soil, among other nutrient rich medium. I personally recommend using approximately a 2 inch base of a good quality enriched substrate such as Flourite or Eco-Complete with a 1 inch layer of fine gravel or sand on top of that.
Using a 5 Gallon bucket and your bathtub or a hose, rinse enough substrate to fill the tank from 2 to 3 inches. If you're going to layer your substrate, wash just one type at a time. With your bucket full of a substrate layer, continue to fill the bucket with water and rinse the substrate while dumping out water until the water looks mostly clear. Many substrates like Flourite will never rinse completely clear, this is fine just rinse it well. If you skip this step you will find it takes a very long time for your tank to clear once you set it up, the better you rinse the less cloudy the tank will be and the less time it will take to completely clear up.
Once your substrate is sufficiently clean, lay down layers in the tank, starting with the nutrient rich substrate such as Flourite and cap that off with plain gravel or sand. I like to slope my substrate up from the front to the back of the tank so that the view in the front of the tank isn't so obstructed by the substrate since small shorter root plants generally go in the front anyway.
Prepare Any Decorations:
Now is time to add any decorations you intend to include in your display, this could be driftwood, rocks, or even man made decorations you find at your local pet store. All decorations should be thoroughly rinsed before you arrange them in the tank to remove any harmful chemicals or debris. It is much harder to add decorations after you start planting plants so take the time now to really think about what you want in your tank and where.
Start Filling Your Tank With Water:
Now it's time to start filling your tank up some but not all the way, just fill the tank a little over half way to cover your plants. The temperature of the water isn't extremely critical but the water should be relatively close to its target temp when the tank will be running, which for most tropical tanks will range in the 75 degree area.
When you fill the tank place a plate on top of the substrate and slowly pour the water over the plate to avoid disturbing the substrate, if you don't do this you will have a very cloudy tank that will take a long time to clear. If you do end up with a cloudy tank this doesn't harm the plants or fish, it just doesn't look good for a while.
You need good quality water for your planted tank, since plants feed off of nitrates and phosphates your water doesn't need to be as pure as a coral reef tank but it should still be high quality. Test your tap water to ensure that it has a KH reading of between 3 and 8 KH, a phosphate level below .5 mg/l, and a nitrate level below 10 mg/l. Test kits for these can be found at most pet stores or online and have simple instructions for water testing. If your tap water isn't at least this good you will need to either buy your water at the store or purchase a filter that can get your water to at least this quality.
Install Your Thermometer, Heater, And Filter:
It's now time to install your thermometer, heater, and filter; don't turn this equipment on yet but install it and ensure there is room for the equipment. The thermometer should be easy to install, my favorite thermometers can be easily stuck to the outside of the aquarium glass in an inconspicuous place, easy to see anytime to ensure the temperature is stable and accurate. Your heater or pair of heaters should be submersible and will likely just stick to the inside back of the tank (or sump if you have one) using suction cups.
Now it's time to install your filter. There are so many varieties and types of filters I can' realistically cover them all here, you should install the filter according to the filter's instruction manual. I recommend using a canister filter for a larger tank or a hang on back filter for smaller sized tanks, either type of filter has the basic construction of adding the media to the filter according to instructions and hanging a tube or filter apparatus over the back of the tank into the water. All filters will be a little bit different but the instructions are generally easy to follow.
I don't recommend an underground filter at all, it will disrupt the plant roots and substrate; Wet-Dry and Trickle filters should also be avoided because the extra contact the water has with the air will remove CO2 that is needed for your plants. A good size filter for a planted tank will circulate around 5-6 times per hour, so a 20 gallon tank will need a filter that runs 100-120 gallons per hour, any more will cause to much commotion and disturb your plants and any less may not filter adequately.
Connect Lighting:
Lighting may very well be the single most important factor in a successful planted aquarium. Planted tanks require more significant lighting than the typical normal output fluorescent bulb that is included with most new aquariums, but there are many types of aquarium lighting alternatives that can be used along with your planted aquarium. The most common lighting used on planted tanks is either "Compact Fluorescent Lighting" or T5 bulbs, there are some higher output lights such as LED's or Metal Halides that can be used but are generally to powerful and designed for coral reef tanks.
Whatever type of lighting you choose you should start by aiming for a certain number of "Watts Per Gallon" or WPG. If you have a 55 gallon tank and are trying to reach 3 WPG you will need lighting with a total of 165 Watts between all your bulbs. WPG is not an exact rule for proper lighting but it is a good start, I like 3 watts per gallon for a planted aquarium using compact fluorescent bulbs, I find this best grows most plants without a huge overgrowth of algae.
Install your lighting above your aquarium along with a light timer for a proper day and night schedule. Standard aquarium lighting is generally very simple to install it usually sits right on top of your tank and can be plugged into a light timer and surge protector. Any standard light timer from a hardware store will work fine, I recommend you start with an 12 hour daytime cycle and lower that a little if algae growth starts to get out of hand.
Planting Your Plants:
Now with the tank water partially full and your decorations and equipment set up it's time to start planting your first plants, you don't have to plant every plant you want today but it is good to get a large portion of your plants in at the beginning to maintain tank stability.
Do your homework on each species of plant you want to keep in the tank before you buy it; make sure you find plants that all require similar water parameters or you will be fighting a losing battle trying to keep them all healthy. Watch out for terrestrial plants sold as aquatic plants, many pet stores will sell these because they catch peoples eye, they can generally be kept fully submerged for awhile but will eventually drown. Be careful with many of the red colored plants, the green in a plant is the clorofil that conducts most of the plants photosynthesis and red plants will require a higher intensity of light and more co2 and may be to demanding for beginners.
I recommend planting taller species towards the back of the aquarium and shorter plants in the front for a cascading effect that wont obstruct your view, there are many types of plants that should be planted slightly differently:
- Crown Plants: Also know as "Rosette" plants should be planted individually in the substrate. Make sure that the crown itself is above the substrate surface. Only the roots should be buried.
- Stem Plants: These are usually sold as rootless bunches. Remove these plants from their weights and bands and separate them into bunches of no more than 3 stems when you plant them. If they float out in the beginning you can place some small stones around the base to hold them down till they get a chance to root themselves.
- Floating Plants: Many plants such as Salvinia or Water Sprites simply float at the top of the water and can be left unrooted. Remember that these plants multiply quickly and should be trimmed to keep no more than 1/3 of the water surface covered to ensure sufficient light gets through to the rest of the tank.
- Tied Plants: Some plants such as Java Moss or Java Fern don't do well rooted in gravel. It is best to tie these plants to large rocks or driftwood using a tie (cloth thread or fishing line), rubber band, or staple.
- Potted Plants: Many plants will arrive planted in plastic pots. These pots need to be removed, cut the pot away using scissors and gently remove any soil or rockwool (used to grow and protect plants during shipment) from the roots before planting them in your tank.
- Foreground Plants: Many foreground plants are very small in diameter and can take quite a bit of patience to plant. The best way to do this is to grab the plant just above the root with tweezers and gently push them into the gravel, this may take a few tries before the plant stays rooted.
Fill Your Tank Up And Let It Run:
If you haven't done it already you should now fill your tank entirely to where the plastic trim lines up with your aquarium. You are going to want to top off this water every couple of days to make up for evaporated water. Keeping the tank completely full will reduce splash from your filters and help maintain water quality, it also looks bad when your tank isn't full. You can buy automatic top off systems that use a sensor and a water reservoir to automatically pump water into the tank when the main tank gets low, these are by no means necessary but they can reduce your regular maintenance or help out when you leave town.
Turn on your filter and watch it for the first few minutes to make sure it is running properly with no leaks or flow obstructions. Turn on your heater(s) and keep a good eye on the temperature of the tank to ensure it stays stable and at the right temperature (75+/- 5). Turn on your lights and connect your light timer, if you have a CO2 system turn that on with very low input for now till you get a chance to better understand your tanks demands. Any other special equipment like an ultraviolet filter, sump, computer, or anything else you may have can also be hooked up now. Once everything is running make sure you keep a close eye on the tank for at least a few hours to ensure everything is connected and running well.
Let the tank run with just plants for at least a week before adding invertebrates and two weeks before adding fish. Also ensure your plants are well rooted before you add fish, one way to do this is to plant one of your foreground plants right up against the glass so you can see when the roots are well rooted in the substrate.
Adding Fish:
Once you are ready to add fish to your tank you should do a great deal of research as to how many of which species you intend to keep. Your planted tank should ideally be sparsely populated, the most commonly accepted population reference is staying safely around 1 cm of fish for every 30 square cm of water surface, this is a generalization and a good place to start.
Most peoples first impulse is to over stock the tank with to many fish or to many different species, your tank will look more natural with just a handful of species give or take depending on tank size rather than dozens of individual species. Schooling species should be kept in groups of 3 or more, at least 12 will show real schooling behavior. Try to spread your species out between species that are bottom dwellers, surface dwellers, and mid tank dwellers to avoid over crowding one section of the tank.
Algae is unavoidable in the aquarium and must be kept under control, introduce some algae eaters to help maintain a hold on it. Try to stick to small species as some algae eaters can get very big and disrupt your plants. You can also get many species of snails and shrimp (ghost or glass shrimp) that will help with the algae.
In a planted tank it is best not to get aggressive fish or very large fish that can disturb your plants roots and the community, if you intend to have cichlids or oscars you should probably leave the plants to a minimum. Fish that eat plants are sometimes ok but should be avoided in large amounts, your plants can withstand a little nibbling but to much with obviously kill them. Add fish slowly over a period of time to give your aquarium a chance to adjust to the new bio load.
Conclusion:
You are now set up and running with your new freshwater planted aquarium but setting up the tank is just the beginning, now is time to enjoy watching your tank grow and develop. Of coarse your tank wont grow and develop very well for very long without the proper maintenance. Keeping healthy plants and fish requires constant attention, testing, and fertilizers.